
Beyond the Pavement: How to Confidently Ride Central Illinois Gravel and Country Roads

Leaving the Smooth Tarmac for Prairie Horizons

Central Illinois rewards riders who are willing to leave the familiar pavement. Beyond the busier highways, a quiet grid of country roads crosses open prairie, shelterbelts, creek valleys, and working farmland. The scenery changes with every mile, from limestone lanes beside soybean fields to shaded stretches near Ashland and the Indian Creek valley. A well-planned Cass County gravel route can offer exactly the right introduction, with a balanced mix of paved and unpaved roads rather than an all-day commitment to rough surfaces.

For a road cyclist, the first miles of gravel can feel surprisingly uncertain. The front tire may wander across loose limestone, tractor ruts can pull at the handlebars, and a crown of chunky aggregate in the center of the road seems designed to upset a perfectly steady line. The solution is not dramatic equipment or racing-level skill. Gravel asks for a different mindset: less rigid steering, more active balance, softer hands, and a willingness to let the bike move beneath the rider. Once that shift becomes natural, the road feels less like an obstacle and more like a changing surface to read and manage.
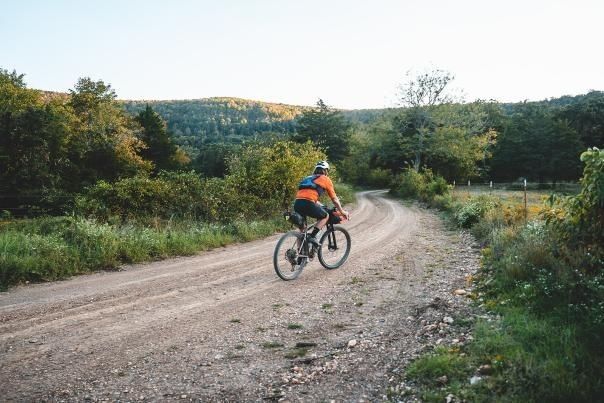
Cyclist riding a gravel road through a wooded countryside landscape
A relaxed approach to changing surfaces helps riders turn uncertain first miles into controlled, enjoyable progress.

Dialing In Tire Pressure for Midwest Farm Grids

High road-bike pressures are built for smooth asphalt, where minimizing tire deformation can help efficiency. On rural limestone, that same firm setup can make the tire skitter over small stones instead of conforming to them. The result is reduced grip, a harsher ride, and a greater chance of a front-wheel washout when the surface loosens in a corner. Tire pressure affects comfort, handling, obstacle control, traction, and pedaling effort, so there is no universal number for every rider or route. A useful starting point is the tire maker”s approved range, followed by careful adjustment for rider weight, tire width, wheel size, rim width, cargo, and surface conditions.

Lower pressure increases the contact patch, allowing more tread to remain connected with the road. It also gives the tire a small amount of built-in suspension, which helps it roll over fine stones and absorb washboard vibration. Tubeless tires generally allow lower pressures than tubed tires because there is no inner tube to pinch against the rim, but lower does not mean unlimited. Pressure must remain within the tire, rim, and tubeless-system limits. The SILCA pressure calculator can help establish a starting point, but manufacturer specifications always take priority, particularly with hookless rims.

The following ranges are practical starting points for a typical 700c gravel tire on Central Illinois farm roads. They are not prescriptions. A heavier rider, loaded bike, narrow tire, rough descent, or sharp-edged aggregate may require more pressure. A wider tire, lighter rider, tubeless setup, and soft or freshly spread gravel may work better toward the lower end. Check pressure with a gauge before each ride, with the tires cool, and make small changes rather than dramatic adjustments.

Rider and setup Tubed tires Tubeless tires
Under 150 pounds with 40 to 45 mm tires 34 to 42 psi front, 37 to 45 psi rear 28 to 36 psi front, 31 to 39 psi rear
150 to 190 pounds with 38 to 45 mm tires 38 to 48 psi front, 42 to 52 psi rear 31 to 40 psi front, 34 to 44 psi rear
Over 190 pounds or carrying luggage 45 to 58 psi front, 49 to 62 psi rear 37 to 48 psi front, 41 to 52 psi rear

Reading the Road Surface and Picking the Sweet Line

Gravel roads are rarely consistent from one bend to the next. Look for the darker, smoother tracks where tractor tires and local pickups have compressed the aggregate. These wheel ruts often provide the best combination of firmness and traction, especially after a dry spell. They may not be perfectly straight, so the rider must make small, early steering corrections instead of waiting until the rut narrows or disappears. A route such as the Cass County loop near Ashland can move quickly between pavement, packed gravel, forest edges, and open farmland, making surface reading just as important as fitness.

The center crown deserves special caution. Rural roads are often shaped so water drains toward the ditches, leaving a raised middle that may collect loose pea gravel and larger stones. Crossing it at an angle with a stiff grip can cause the front wheel to deflect. If the crown is unavoidable, reduce speed before reaching it, keep the handlebars straight, and allow the bike to roll across without abrupt input. On a corner, use the firmest visible track rather than automatically following the shortest route. Freshly laid gravel can be especially deceptive, because a smooth-looking surface may have little underlying stability.

Keep the eyes up and scan approximately 15 to 20 feet ahead, while briefly checking farther down the road for the next change. That distance gives enough time to choose a line without staring at the stones immediately in front of the tire. Smooth transitions matter more than perfect positioning. A rider should aim for the selected rut, cross a loose patch with a steady speed, then settle into the next firm track.

  • Choose compacted wheel tracks when they are clear and free of deep ruts.
  • Slow before loose corners rather than braking hard while leaned over.
  • Cross crowns and drainage cuts with relaxed arms and nearly straight handlebars.
  • Look through the turn and plan the exit, not just the patch of gravel under the front wheel.
  • Accept a slower line when the surface is freshly graded, wet, or covered in large aggregate.

Body Mechanics That Prevent Washouts and Upper Body Fatigue

A gravel bike handles best when the rider provides stability without locking the machine in place. Unweight the saddle slightly over washboard, potholes, and abrupt changes in texture. This does not mean standing fully and attacking every rough section. A light hover, with pedals level and knees and elbows bent, lets the bike rise, dip, and shift beneath the hips while the rider maintains balance. On smoother gravel, remain seated and relaxed, but avoid pushing the body rigidly into the saddle and handlebars.

The upper body should act as suspension. Relax the shoulders, keep the elbows soft, and hold the bars firmly enough for control but lightly enough to allow small movements. White-knuckle steering amplifies every stone and encourages overcorrection. The bike may wander by a few inches without actually losing its line. Keep the head stable, look ahead, and use the hips and legs for balance rather than trying to force the front wheel through every ripple.

Rear-wheel traction is equally important. A smooth, seated cadence keeps weight over the drive wheel and reduces the sudden torque that can spin the tire on loose rollers or short climbs. Shift into an easier gear before the surface steepens, then pedal in a controlled rhythm. When standing is necessary, keep the effort steady and avoid rocking the bike aggressively from side to side. These habits align with broader gravel setup principles, including choosing gearing, tire width, cockpit dimensions, and wheel equipment for the intended terrain rather than for appearance alone.

  1. Prepare before the rough patch. Reduce speed, select an appropriate gear, and move the hands to a secure position.
  2. Lighten the saddle contact. Hover with bent knees and elbows so the bike can move beneath the body.
  3. Keep the hands quiet. Guide the bars with small corrections and resist sudden steering.
  4. Maintain traction. Pedal smoothly, especially uphill, and avoid abrupt standing accelerations.
  5. Recover after the section. Sit naturally, relax the grip, and reassess pressure, fatigue, and line choice.

Navigating Rural Hazards and Unpaved Country Etiquette

Central Illinois gravel roads are working transportation corridors, not closed cycling facilities. Agricultural machinery may occupy most of the road, move slowly, or emerge from a field entrance without much warning. When approaching a tractor, combine, or truck, reduce speed early, move to a visible and predictable position, and make sure the operator has seen the group before passing. Never squeeze between machinery and a ditch, and do not pass near a blind crest, curve, or driveway. If the road is narrow, stopping well back is often the safest and most courteous choice.

Blind farm lane intersections require the same discipline. Ease off the pedals, cover the brakes, and expect a pickup, ATV, dog, or farm vehicle to appear. In loose corners and washboard turns, brake before the turn and release or greatly reduce braking once the bike is leaned. Calm, predictable inputs preserve traction. If the rear wheel begins to slide, keep the bike pointed toward the intended exit, avoid grabbing the front brake, and reduce speed gradually as the surface allows.

Self-sufficiency matters because a remote county road may offer no nearby bike shop, water stop, or reliable phone service. A route that appears easy on a map can become demanding when wind, heat, fresh gravel, or a mechanical problem enters the day. Carry enough food and water for the full route, even when a convenience store or campground is marked as an option. Some Cass County rides include useful access near Ashland, but those services should be treated as support rather than a guarantee. It is also good rural etiquette to support local diners and stores, follow posted road restrictions, avoid littering, and check county maintenance updates before departure.

  • Two spare tubes, even on a tubeless bike, plus tire levers and a reliable pump or inflator.
  • A tubeless plug kit, spare valve core, multi-tool, quick link, and a small amount of chain lubricant.
  • Enough water and food for delays, heat, wind, and an unexpectedly slow pace.
  • Front and rear lights, bright clothing, identification, emergency contact information, and a charged phone.
  • Offline route maps, a bailout plan, and a weather check before entering remote sectors.
  • Courtesy toward residents, farm workers, horses, pedestrians, and other road users.

Map Your Next Country Route and Roll with Confidence

Confident gravel riding rests on three fundamentals: soft hands, appropriate tire pressure, and vigilant line choice. Lower pressure helps the tires stay connected to limestone, but only when it respects equipment limits. A relaxed posture lets the bike float over washboard and ruts, while steady cadence protects rear-wheel traction. Looking well ahead gives the rider time to choose compacted tracks, avoid the loose crown, and brake before trouble rather than during it.

Start with a 50-50 paved-and-gravel loop close to a dependable bailout point. The Ashland area provides a useful model, with mixed surfaces, farming scenery, moderate distance, and opportunities to shorten the ride if conditions deteriorate. Ride the first outings at an exploratory pace, adjust pressure in small increments, and note how the bike responds to different surfaces. Then invite a few compatible club riders, review group ride etiquette, and build toward longer county-to-county routes. Central Illinois has plenty of quiet roads waiting beyond the pavement, and the right preparation turns each one into a safer, more rewarding place to ride.

Beyond the Pavement: How to Confidently Ride Central Illinois Gravel and Country Roads

Leaving the Smooth Tarmac for Prairie Horizons

Central Illinois rewards riders who are willing to leave the familiar pavement. Beyond the busier highways, a quiet grid of country roads crosses open prairie, shelterbelts, creek valleys, and working farmland. The scenery changes with every mile, from limestone lanes beside soybean fields to shaded stretches near Ashland and the Indian Creek valley. A well-planned Cass County gravel route can offer exactly the right introduction, with a balanced mix of paved and unpaved roads rather than an all-day commitment to rough surfaces.

For a road cyclist, the first miles of gravel can feel surprisingly uncertain. The front tire may wander across loose limestone, tractor ruts can pull at the handlebars, and a crown of chunky aggregate in the center of the road seems designed to upset a perfectly steady line. The solution is not dramatic equipment or racing-level skill. Gravel asks for a different mindset: less rigid steering, more active balance, softer hands, and a willingness to let the bike move beneath the rider. Once that shift becomes natural, the road feels less like an obstacle and more like a changing surface to read and manage.

Cyclist riding a gravel road through a wooded countryside landscape
A relaxed approach to changing surfaces helps riders turn uncertain first miles into controlled, enjoyable progress.

Dialing In Tire Pressure for Midwest Farm Grids

High road-bike pressures are built for smooth asphalt, where minimizing tire deformation can help efficiency. On rural limestone, that same firm setup can make the tire skitter over small stones instead of conforming to them. The result is reduced grip, a harsher ride, and a greater chance of a front-wheel washout when the surface loosens in a corner. Tire pressure affects comfort, handling, obstacle control, traction, and pedaling effort, so there is no universal number for every rider or route. A useful starting point is the tire maker”s approved range, followed by careful adjustment for rider weight, tire width, wheel size, rim width, cargo, and surface conditions.

Lower pressure increases the contact patch, allowing more tread to remain connected with the road. It also gives the tire a small amount of built-in suspension, which helps it roll over fine stones and absorb washboard vibration. Tubeless tires generally allow lower pressures than tubed tires because there is no inner tube to pinch against the rim, but lower does not mean unlimited. Pressure must remain within the tire, rim, and tubeless-system limits. The SILCA pressure calculator can help establish a starting point, but manufacturer specifications always take priority, particularly with hookless rims.

The following ranges are practical starting points for a typical 700c gravel tire on Central Illinois farm roads. They are not prescriptions. A heavier rider, loaded bike, narrow tire, rough descent, or sharp-edged aggregate may require more pressure. A wider tire, lighter rider, tubeless setup, and soft or freshly spread gravel may work better toward the lower end. Check pressure with a gauge before each ride, with the tires cool, and make small changes rather than dramatic adjustments.

Rider and setup Tubed tires Tubeless tires
Under 150 pounds with 40 to 45 mm tires 34 to 42 psi front, 37 to 45 psi rear 28 to 36 psi front, 31 to 39 psi rear
150 to 190 pounds with 38 to 45 mm tires 38 to 48 psi front, 42 to 52 psi rear 31 to 40 psi front, 34 to 44 psi rear
Over 190 pounds or carrying luggage 45 to 58 psi front, 49 to 62 psi rear 37 to 48 psi front, 41 to 52 psi rear

Reading the Road Surface and Picking the Sweet Line

Gravel roads are rarely consistent from one bend to the next. Look for the darker, smoother tracks where tractor tires and local pickups have compressed the aggregate. These wheel ruts often provide the best combination of firmness and traction, especially after a dry spell. They may not be perfectly straight, so the rider must make small, early steering corrections instead of waiting until the rut narrows or disappears. A route such as the Cass County loop near Ashland can move quickly between pavement, packed gravel, forest edges, and open farmland, making surface reading just as important as fitness.

The center crown deserves special caution. Rural roads are often shaped so water drains toward the ditches, leaving a raised middle that may collect loose pea gravel and larger stones. Crossing it at an angle with a stiff grip can cause the front wheel to deflect. If the crown is unavoidable, reduce speed before reaching it, keep the handlebars straight, and allow the bike to roll across without abrupt input. On a corner, use the firmest visible track rather than automatically following the shortest route. Freshly laid gravel can be especially deceptive, because a smooth-looking surface may have little underlying stability.

Keep the eyes up and scan approximately 15 to 20 feet ahead, while briefly checking farther down the road for the next change. That distance gives enough time to choose a line without staring at the stones immediately in front of the tire. Smooth transitions matter more than perfect positioning. A rider should aim for the selected rut, cross a loose patch with a steady speed, then settle into the next firm track.

  • Choose compacted wheel tracks when they are clear and free of deep ruts.
  • Slow before loose corners rather than braking hard while leaned over.
  • Cross crowns and drainage cuts with relaxed arms and nearly straight handlebars.
  • Look through the turn and plan the exit, not just the patch of gravel under the front wheel.
  • Accept a slower line when the surface is freshly graded, wet, or covered in large aggregate.

Body Mechanics That Prevent Washouts and Upper Body Fatigue

A gravel bike handles best when the rider provides stability without locking the machine in place. Unweight the saddle slightly over washboard, potholes, and abrupt changes in texture. This does not mean standing fully and attacking every rough section. A light hover, with pedals level and knees and elbows bent, lets the bike rise, dip, and shift beneath the hips while the rider maintains balance. On smoother gravel, remain seated and relaxed, but avoid pushing the body rigidly into the saddle and handlebars.

The upper body should act as suspension. Relax the shoulders, keep the elbows soft, and hold the bars firmly enough for control but lightly enough to allow small movements. White-knuckle steering amplifies every stone and encourages overcorrection. The bike may wander by a few inches without actually losing its line. Keep the head stable, look ahead, and use the hips and legs for balance rather than trying to force the front wheel through every ripple.

Rear-wheel traction is equally important. A smooth, seated cadence keeps weight over the drive wheel and reduces the sudden torque that can spin the tire on loose rollers or short climbs. Shift into an easier gear before the surface steepens, then pedal in a controlled rhythm. When standing is necessary, keep the effort steady and avoid rocking the bike aggressively from side to side. These habits align with broader gravel setup principles, including choosing gearing, tire width, cockpit dimensions, and wheel equipment for the intended terrain rather than for appearance alone.

  1. Prepare before the rough patch. Reduce speed, select an appropriate gear, and move the hands to a secure position.
  2. Lighten the saddle contact. Hover with bent knees and elbows so the bike can move beneath the body.
  3. Keep the hands quiet. Guide the bars with small corrections and resist sudden steering.
  4. Maintain traction. Pedal smoothly, especially uphill, and avoid abrupt standing accelerations.
  5. Recover after the section. Sit naturally, relax the grip, and reassess pressure, fatigue, and line choice.

Navigating Rural Hazards and Unpaved Country Etiquette

Central Illinois gravel roads are working transportation corridors, not closed cycling facilities. Agricultural machinery may occupy most of the road, move slowly, or emerge from a field entrance without much warning. When approaching a tractor, combine, or truck, reduce speed early, move to a visible and predictable position, and make sure the operator has seen the group before passing. Never squeeze between machinery and a ditch, and do not pass near a blind crest, curve, or driveway. If the road is narrow, stopping well back is often the safest and most courteous choice.

Blind farm lane intersections require the same discipline. Ease off the pedals, cover the brakes, and expect a pickup, ATV, dog, or farm vehicle to appear. In loose corners and washboard turns, brake before the turn and release or greatly reduce braking once the bike is leaned. Calm, predictable inputs preserve traction. If the rear wheel begins to slide, keep the bike pointed toward the intended exit, avoid grabbing the front brake, and reduce speed gradually as the surface allows.

Self-sufficiency matters because a remote county road may offer no nearby bike shop, water stop, or reliable phone service. A route that appears easy on a map can become demanding when wind, heat, fresh gravel, or a mechanical problem enters the day. Carry enough food and water for the full route, even when a convenience store or campground is marked as an option. Some Cass County rides include useful access near Ashland, but those services should be treated as support rather than a guarantee. It is also good rural etiquette to support local diners and stores, follow posted road restrictions, avoid littering, and check county maintenance updates before departure.

  • Two spare tubes, even on a tubeless bike, plus tire levers and a reliable pump or inflator.
  • A tubeless plug kit, spare valve core, multi-tool, quick link, and a small amount of chain lubricant.
  • Enough water and food for delays, heat, wind, and an unexpectedly slow pace.
  • Front and rear lights, bright clothing, identification, emergency contact information, and a charged phone.
  • Offline route maps, a bailout plan, and a weather check before entering remote sectors.
  • Courtesy toward residents, farm workers, horses, pedestrians, and other road users.

Map Your Next Country Route and Roll with Confidence

Confident gravel riding rests on three fundamentals: soft hands, appropriate tire pressure, and vigilant line choice. Lower pressure helps the tires stay connected to limestone, but only when it respects equipment limits. A relaxed posture lets the bike float over washboard and ruts, while steady cadence protects rear-wheel traction. Looking well ahead gives the rider time to choose compacted tracks, avoid the loose crown, and brake before trouble rather than during it.

Start with a 50-50 paved-and-gravel loop close to a dependable bailout point. The Ashland area provides a useful model, with mixed surfaces, farming scenery, moderate distance, and opportunities to shorten the ride if conditions deteriorate. Ride the first outings at an exploratory pace, adjust pressure in small increments, and note how the bike responds to different surfaces. Then invite a few compatible club riders, review group ride etiquette, and build toward longer county-to-county routes. Central Illinois has plenty of quiet roads waiting beyond the pavement, and the right preparation turns each one into a safer, more rewarding place to ride.

Beyond the Pavement: How to Confidently Ride Central Illinois Gravel and Country Roads

Leaving the Smooth Tarmac for Prairie Horizons

Central Illinois rewards riders who are willing to leave the familiar pavement. Beyond the busier highways, a quiet grid of country roads crosses open prairie, shelterbelts, creek valleys, and working farmland. The scenery changes with every mile, from limestone lanes beside soybean fields to shaded stretches near Ashland and the Indian Creek valley. A well-planned Cass County gravel route can offer exactly the right introduction, with a balanced mix of paved and unpaved roads rather than an all-day commitment to rough surfaces.

For a road cyclist, the first miles of gravel can feel surprisingly uncertain. The front tire may wander across loose limestone, tractor ruts can pull at the handlebars, and a crown of chunky aggregate in the center of the road seems designed to upset a perfectly steady line. The solution is not dramatic equipment or racing-level skill. Gravel asks for a different mindset: less rigid steering, more active balance, softer hands, and a willingness to let the bike move beneath the rider. Once that shift becomes natural, the road feels less like an obstacle and more like a changing surface to read and manage.

Cyclist riding a gravel road through a wooded countryside landscape
A relaxed approach to changing surfaces helps riders turn uncertain first miles into controlled, enjoyable progress.

Dialing In Tire Pressure for Midwest Farm Grids

High road-bike pressures are built for smooth asphalt, where minimizing tire deformation can help efficiency. On rural limestone, that same firm setup can make the tire skitter over small stones instead of conforming to them. The result is reduced grip, a harsher ride, and a greater chance of a front-wheel washout when the surface loosens in a corner. Tire pressure affects comfort, handling, obstacle control, traction, and pedaling effort, so there is no universal number for every rider or route. A useful starting point is the tire maker”s approved range, followed by careful adjustment for rider weight, tire width, wheel size, rim width, cargo, and surface conditions.

Lower pressure increases the contact patch, allowing more tread to remain connected with the road. It also gives the tire a small amount of built-in suspension, which helps it roll over fine stones and absorb washboard vibration. Tubeless tires generally allow lower pressures than tubed tires because there is no inner tube to pinch against the rim, but lower does not mean unlimited. Pressure must remain within the tire, rim, and tubeless-system limits. The SILCA pressure calculator can help establish a starting point, but manufacturer specifications always take priority, particularly with hookless rims.

The following ranges are practical starting points for a typical 700c gravel tire on Central Illinois farm roads. They are not prescriptions. A heavier rider, loaded bike, narrow tire, rough descent, or sharp-edged aggregate may require more pressure. A wider tire, lighter rider, tubeless setup, and soft or freshly spread gravel may work better toward the lower end. Check pressure with a gauge before each ride, with the tires cool, and make small changes rather than dramatic adjustments.

Rider and setup Tubed tires Tubeless tires
Under 150 pounds with 40 to 45 mm tires 34 to 42 psi front, 37 to 45 psi rear 28 to 36 psi front, 31 to 39 psi rear
150 to 190 pounds with 38 to 45 mm tires 38 to 48 psi front, 42 to 52 psi rear 31 to 40 psi front, 34 to 44 psi rear
Over 190 pounds or carrying luggage 45 to 58 psi front, 49 to 62 psi rear 37 to 48 psi front, 41 to 52 psi rear

Reading the Road Surface and Picking the Sweet Line

Gravel roads are rarely consistent from one bend to the next. Look for the darker, smoother tracks where tractor tires and local pickups have compressed the aggregate. These wheel ruts often provide the best combination of firmness and traction, especially after a dry spell. They may not be perfectly straight, so the rider must make small, early steering corrections instead of waiting until the rut narrows or disappears. A route such as the Cass County loop near Ashland can move quickly between pavement, packed gravel, forest edges, and open farmland, making surface reading just as important as fitness.

The center crown deserves special caution. Rural roads are often shaped so water drains toward the ditches, leaving a raised middle that may collect loose pea gravel and larger stones. Crossing it at an angle with a stiff grip can cause the front wheel to deflect. If the crown is unavoidable, reduce speed before reaching it, keep the handlebars straight, and allow the bike to roll across without abrupt input. On a corner, use the firmest visible track rather than automatically following the shortest route. Freshly laid gravel can be especially deceptive, because a smooth-looking surface may have little underlying stability.

Keep the eyes up and scan approximately 15 to 20 feet ahead, while briefly checking farther down the road for the next change. That distance gives enough time to choose a line without staring at the stones immediately in front of the tire. Smooth transitions matter more than perfect positioning. A rider should aim for the selected rut, cross a loose patch with a steady speed, then settle into the next firm track.

  • Choose compacted wheel tracks when they are clear and free of deep ruts.
  • Slow before loose corners rather than braking hard while leaned over.
  • Cross crowns and drainage cuts with relaxed arms and nearly straight handlebars.
  • Look through the turn and plan the exit, not just the patch of gravel under the front wheel.
  • Accept a slower line when the surface is freshly graded, wet, or covered in large aggregate.

Body Mechanics That Prevent Washouts and Upper Body Fatigue

A gravel bike handles best when the rider provides stability without locking the machine in place. Unweight the saddle slightly over washboard, potholes, and abrupt changes in texture. This does not mean standing fully and attacking every rough section. A light hover, with pedals level and knees and elbows bent, lets the bike rise, dip, and shift beneath the hips while the rider maintains balance. On smoother gravel, remain seated and relaxed, but avoid pushing the body rigidly into the saddle and handlebars.

The upper body should act as suspension. Relax the shoulders, keep the elbows soft, and hold the bars firmly enough for control but lightly enough to allow small movements. White-knuckle steering amplifies every stone and encourages overcorrection. The bike may wander by a few inches without actually losing its line. Keep the head stable, look ahead, and use the hips and legs for balance rather than trying to force the front wheel through every ripple.

Rear-wheel traction is equally important. A smooth, seated cadence keeps weight over the drive wheel and reduces the sudden torque that can spin the tire on loose rollers or short climbs. Shift into an easier gear before the surface steepens, then pedal in a controlled rhythm. When standing is necessary, keep the effort steady and avoid rocking the bike aggressively from side to side. These habits align with broader gravel setup principles, including choosing gearing, tire width, cockpit dimensions, and wheel equipment for the intended terrain rather than for appearance alone.

  1. Prepare before the rough patch. Reduce speed, select an appropriate gear, and move the hands to a secure position.
  2. Lighten the saddle contact. Hover with bent knees and elbows so the bike can move beneath the body.
  3. Keep the hands quiet. Guide the bars with small corrections and resist sudden steering.
  4. Maintain traction. Pedal smoothly, especially uphill, and avoid abrupt standing accelerations.
  5. Recover after the section. Sit naturally, relax the grip, and reassess pressure, fatigue, and line choice.

Navigating Rural Hazards and Unpaved Country Etiquette

Central Illinois gravel roads are working transportation corridors, not closed cycling facilities. Agricultural machinery may occupy most of the road, move slowly, or emerge from a field entrance without much warning. When approaching a tractor, combine, or truck, reduce speed early, move to a visible and predictable position, and make sure the operator has seen the group before passing. Never squeeze between machinery and a ditch, and do not pass near a blind crest, curve, or driveway. If the road is narrow, stopping well back is often the safest and most courteous choice.

Blind farm lane intersections require the same discipline. Ease off the pedals, cover the brakes, and expect a pickup, ATV, dog, or farm vehicle to appear. In loose corners and washboard turns, brake before the turn and release or greatly reduce braking once the bike is leaned. Calm, predictable inputs preserve traction. If the rear wheel begins to slide, keep the bike pointed toward the intended exit, avoid grabbing the front brake, and reduce speed gradually as the surface allows.

Self-sufficiency matters because a remote county road may offer no nearby bike shop, water stop, or reliable phone service. A route that appears easy on a map can become demanding when wind, heat, fresh gravel, or a mechanical problem enters the day. Carry enough food and water for the full route, even when a convenience store or campground is marked as an option. Some Cass County rides include useful access near Ashland, but those services should be treated as support rather than a guarantee. It is also good rural etiquette to support local diners and stores, follow posted road restrictions, avoid littering, and check county maintenance updates before departure.

  • Two spare tubes, even on a tubeless bike, plus tire levers and a reliable pump or inflator.
  • A tubeless plug kit, spare valve core, multi-tool, quick link, and a small amount of chain lubricant.
  • Enough water and food for delays, heat, wind, and an unexpectedly slow pace.
  • Front and rear lights, bright clothing, identification, emergency contact information, and a charged phone.
  • Offline route maps, a bailout plan, and a weather check before entering remote sectors.
  • Courtesy toward residents, farm workers, horses, pedestrians, and other road users.

Map Your Next Country Route and Roll with Confidence

Confident gravel riding rests on three fundamentals: soft hands, appropriate tire pressure, and vigilant line choice. Lower pressure helps the tires stay connected to limestone, but only when it respects equipment limits. A relaxed posture lets the bike float over washboard and ruts, while steady cadence protects rear-wheel traction. Looking well ahead gives the rider time to choose compacted tracks, avoid the loose crown, and brake before trouble rather than during it.

Start with a 50-50 paved-and-gravel loop close to a dependable bailout point. The Ashland area provides a useful model, with mixed surfaces, farming scenery, moderate distance, and opportunities to shorten the ride if conditions deteriorate. Ride the first outings at an exploratory pace, adjust pressure in small increments, and note how the bike responds to different surfaces. Then invite a few compatible club riders, review group ride etiquette, and build toward longer county-to-county routes. Central Illinois has plenty of quiet roads waiting beyond the pavement, and the right preparation turns each one into a safer, more rewarding place to ride.

Beyond the Pavement: How to Confidently Ride Central Illinois Gravel and Country Roads

Leaving the Smooth Tarmac for Prairie Horizons

Central Illinois rewards riders who are willing to leave the familiar pavement. Beyond the busier highways, a quiet grid of country roads crosses open prairie, shelterbelts, creek valleys, and working farmland. The scenery changes with every mile, from limestone lanes beside soybean fields to shaded stretches near Ashland and the Indian Creek valley. A well-planned Cass County gravel route can offer exactly the right introduction, with a balanced mix of paved and unpaved roads rather than an all-day commitment to rough surfaces.

For a road cyclist, the first miles of gravel can feel surprisingly uncertain. The front tire may wander across loose limestone, tractor ruts can pull at the handlebars, and a crown of chunky aggregate in the center of the road seems designed to upset a perfectly steady line. The solution is not dramatic equipment or racing-level skill. Gravel asks for a different mindset: less rigid steering, more active balance, softer hands, and a willingness to let the bike move beneath the rider. Once that shift becomes natural, the road feels less like an obstacle and more like a changing surface to read and manage.

Cyclist riding a gravel road through a wooded countryside landscape
A relaxed approach to changing surfaces helps riders turn uncertain first miles into controlled, enjoyable progress.

Dialing In Tire Pressure for Midwest Farm Grids

High road-bike pressures are built for smooth asphalt, where minimizing tire deformation can help efficiency. On rural limestone, that same firm setup can make the tire skitter over small stones instead of conforming to them. The result is reduced grip, a harsher ride, and a greater chance of a front-wheel washout when the surface loosens in a corner. Tire pressure affects comfort, handling, obstacle control, traction, and pedaling effort, so there is no universal number for every rider or route. A useful starting point is the tire maker”s approved range, followed by careful adjustment for rider weight, tire width, wheel size, rim width, cargo, and surface conditions.

Lower pressure increases the contact patch, allowing more tread to remain connected with the road. It also gives the tire a small amount of built-in suspension, which helps it roll over fine stones and absorb washboard vibration. Tubeless tires generally allow lower pressures than tubed tires because there is no inner tube to pinch against the rim, but lower does not mean unlimited. Pressure must remain within the tire, rim, and tubeless-system limits. The SILCA pressure calculator can help establish a starting point, but manufacturer specifications always take priority, particularly with hookless rims.

The following ranges are practical starting points for a typical 700c gravel tire on Central Illinois farm roads. They are not prescriptions. A heavier rider, loaded bike, narrow tire, rough descent, or sharp-edged aggregate may require more pressure. A wider tire, lighter rider, tubeless setup, and soft or freshly spread gravel may work better toward the lower end. Check pressure with a gauge before each ride, with the tires cool, and make small changes rather than dramatic adjustments.

Rider and setup Tubed tires Tubeless tires
Under 150 pounds with 40 to 45 mm tires 34 to 42 psi front, 37 to 45 psi rear 28 to 36 psi front, 31 to 39 psi rear
150 to 190 pounds with 38 to 45 mm tires 38 to 48 psi front, 42 to 52 psi rear 31 to 40 psi front, 34 to 44 psi rear
Over 190 pounds or carrying luggage 45 to 58 psi front, 49 to 62 psi rear 37 to 48 psi front, 41 to 52 psi rear

Reading the Road Surface and Picking the Sweet Line

Gravel roads are rarely consistent from one bend to the next. Look for the darker, smoother tracks where tractor tires and local pickups have compressed the aggregate. These wheel ruts often provide the best combination of firmness and traction, especially after a dry spell. They may not be perfectly straight, so the rider must make small, early steering corrections instead of waiting until the rut narrows or disappears. A route such as the Cass County loop near Ashland can move quickly between pavement, packed gravel, forest edges, and open farmland, making surface reading just as important as fitness.

The center crown deserves special caution. Rural roads are often shaped so water drains toward the ditches, leaving a raised middle that may collect loose pea gravel and larger stones. Crossing it at an angle with a stiff grip can cause the front wheel to deflect. If the crown is unavoidable, reduce speed before reaching it, keep the handlebars straight, and allow the bike to roll across without abrupt input. On a corner, use the firmest visible track rather than automatically following the shortest route. Freshly laid gravel can be especially deceptive, because a smooth-looking surface may have little underlying stability.

Keep the eyes up and scan approximately 15 to 20 feet ahead, while briefly checking farther down the road for the next change. That distance gives enough time to choose a line without staring at the stones immediately in front of the tire. Smooth transitions matter more than perfect positioning. A rider should aim for the selected rut, cross a loose patch with a steady speed, then settle into the next firm track.

  • Choose compacted wheel tracks when they are clear and free of deep ruts.
  • Slow before loose corners rather than braking hard while leaned over.
  • Cross crowns and drainage cuts with relaxed arms and nearly straight handlebars.
  • Look through the turn and plan the exit, not just the patch of gravel under the front wheel.
  • Accept a slower line when the surface is freshly graded, wet, or covered in large aggregate.

Body Mechanics That Prevent Washouts and Upper Body Fatigue

A gravel bike handles best when the rider provides stability without locking the machine in place. Unweight the saddle slightly over washboard, potholes, and abrupt changes in texture. This does not mean standing fully and attacking every rough section. A light hover, with pedals level and knees and elbows bent, lets the bike rise, dip, and shift beneath the hips while the rider maintains balance. On smoother gravel, remain seated and relaxed, but avoid pushing the body rigidly into the saddle and handlebars.

The upper body should act as suspension. Relax the shoulders, keep the elbows soft, and hold the bars firmly enough for control but lightly enough to allow small movements. White-knuckle steering amplifies every stone and encourages overcorrection. The bike may wander by a few inches without actually losing its line. Keep the head stable, look ahead, and use the hips and legs for balance rather than trying to force the front wheel through every ripple.

Rear-wheel traction is equally important. A smooth, seated cadence keeps weight over the drive wheel and reduces the sudden torque that can spin the tire on loose rollers or short climbs. Shift into an easier gear before the surface steepens, then pedal in a controlled rhythm. When standing is necessary, keep the effort steady and avoid rocking the bike aggressively from side to side. These habits align with broader gravel setup principles, including choosing gearing, tire width, cockpit dimensions, and wheel equipment for the intended terrain rather than for appearance alone.

  1. Prepare before the rough patch. Reduce speed, select an appropriate gear, and move the hands to a secure position.
  2. Lighten the saddle contact. Hover with bent knees and elbows so the bike can move beneath the body.
  3. Keep the hands quiet. Guide the bars with small corrections and resist sudden steering.
  4. Maintain traction. Pedal smoothly, especially uphill, and avoid abrupt standing accelerations.
  5. Recover after the section. Sit naturally, relax the grip, and reassess pressure, fatigue, and line choice.

Navigating Rural Hazards and Unpaved Country Etiquette

Central Illinois gravel roads are working transportation corridors, not closed cycling facilities. Agricultural machinery may occupy most of the road, move slowly, or emerge from a field entrance without much warning. When approaching a tractor, combine, or truck, reduce speed early, move to a visible and predictable position, and make sure the operator has seen the group before passing. Never squeeze between machinery and a ditch, and do not pass near a blind crest, curve, or driveway. If the road is narrow, stopping well back is often the safest and most courteous choice.

Blind farm lane intersections require the same discipline. Ease off the pedals, cover the brakes, and expect a pickup, ATV, dog, or farm vehicle to appear. In loose corners and washboard turns, brake before the turn and release or greatly reduce braking once the bike is leaned. Calm, predictable inputs preserve traction. If the rear wheel begins to slide, keep the bike pointed toward the intended exit, avoid grabbing the front brake, and reduce speed gradually as the surface allows.

Self-sufficiency matters because a remote county road may offer no nearby bike shop, water stop, or reliable phone service. A route that appears easy on a map can become demanding when wind, heat, fresh gravel, or a mechanical problem enters the day. Carry enough food and water for the full route, even when a convenience store or campground is marked as an option. Some Cass County rides include useful access near Ashland, but those services should be treated as support rather than a guarantee. It is also good rural etiquette to support local diners and stores, follow posted road restrictions, avoid littering, and check county maintenance updates before departure.

  • Two spare tubes, even on a tubeless bike, plus tire levers and a reliable pump or inflator.
  • A tubeless plug kit, spare valve core, multi-tool, quick link, and a small amount of chain lubricant.
  • Enough water and food for delays, heat, wind, and an unexpectedly slow pace.
  • Front and rear lights, bright clothing, identification, emergency contact information, and a charged phone.
  • Offline route maps, a bailout plan, and a weather check before entering remote sectors.
  • Courtesy toward residents, farm workers, horses, pedestrians, and other road users.

Map Your Next Country Route and Roll with Confidence

Confident gravel riding rests on three fundamentals: soft hands, appropriate tire pressure, and vigilant line choice. Lower pressure helps the tires stay connected to limestone, but only when it respects equipment limits. A relaxed posture lets the bike float over washboard and ruts, while steady cadence protects rear-wheel traction. Looking well ahead gives the rider time to choose compacted tracks, avoid the loose crown, and brake before trouble rather than during it.

Start with a 50-50 paved-and-gravel loop close to a dependable bailout point. The Ashland area provides a useful model, with mixed surfaces, farming scenery, moderate distance, and opportunities to shorten the ride if conditions deteriorate. Ride the first outings at an exploratory pace, adjust pressure in small increments, and note how the bike responds to different surfaces. Then invite a few compatible club riders, review group ride etiquette, and build toward longer county-to-county routes. Central Illinois has plenty of quiet roads waiting beyond the pavement, and the right preparation turns each one into a safer, more rewarding place to ride.